 Mike Carter
The first egg I ever collected was from a Black Australorp named Harriet, and I carried it inside with both hands like it was made of gold. My husband pointed out I was being ridiculous. He wasn’t wrong. But twelve years and over 200 birds later, I can tell you that feeling never fully goes away, and it’s exactly the reason backyard flocks have exploded in popularity. According to the USDA, backyard poultry keeping grew by nearly 4 million households between 2012 and 2019, and that number has only climbed since. If you’re thinking about starting your own flock, you’re not alone, and you’re not too late.
Before You Buy a Single Chick
Stop. Before you order 12 Buff Orpingtons from a hatchery catalog, do three things first.
Check your local ordinances. Call your city or county office, or look it up online. Nothing is more heartbreaking than raising birds for three months and getting a cease-and-desist letter from your municipality. Many cities allow hens but ban roosters. Some cap flock size at 4 or 6 birds. A few suburban neighborhoods with HOAs prohibit chickens entirely. This is the single most skipped step, and it costs people real money and real heartbreak.
Talk to your household. Chickens are a daily commitment. Someone needs to open the coop at dawn and close it at dusk. Someone needs to refill water when it freezes in January. If you travel, you need a chicken sitter. Be honest with everyone who lives with you about what this actually involves before you’re in it.
Set a realistic budget. Startup costs catch first-timers off guard. Between a coop, bedding, feeders, waterers, chicks, and feed, you’re looking at $300 to $700 to get started, sometimes more depending on your coop situation. The ongoing cost averages around $20 to $30 per month for a flock of 4 to 6 standard-size hens.
Choosing the Right Breeds for Your Goals
Not all chickens are created equal, and breed selection is where most beginners make their biggest mistake. They choose on looks. I get it. Silkies are adorable. But a Silkie will give you maybe 3 eggs a week and needs extra protection from the rain. That might not match what you actually want.
Think about your primary goal first: eggs, meat, dual purpose, or friendly pets that happen to lay. Your answer drives your breed decision more than feather color.
For reliable egg production, you want the workhorses. Rhode Island Reds produce 250 to 300 eggs per year. Golden Comets hit 280 to 320. Leghorns push up to 280 white eggs per year. They’re not always friendly, but they deliver.
For families with kids, temperament matters more. Buff Orpingtons, Black Australorps, and Speckled Sussex are lap chickens. They tolerate handling and forgive beginner mistakes. Black Australorps also hold the world record for egg laying (364 eggs in 365 days, though your backyard bird won’t hit that), so you don’t sacrifice production for personality.
Cold climates need breeds with small or rose combs. Large single combs get frostbite easily. Wyandottes, Dominiques, and Easter Eggers all handle cold well. If you’re in a hot climate, Mediterranean breeds like Leghorns and Anconas handle heat better and tend to be lighter bodied, active foragers.
My honest recommendation for beginners: start with 3 to 4 Buff Orpingtons or Black Australorps. You’ll get good production, friendly birds, and a manageable learning curve.
The Coop: What Actually Matters
8 Beginner Chicken Care Mistakes To Avoid | Backyard Chickens 101 | Egg Laying Hens and Chicks · Oak Abode on YouTube
A coop doesn’t need to be Pinterest-worthy. It needs to be predator-proof, well-ventilated, and easy for you to clean. In that order.
Predator-proofing is non-negotiable. Raccoons can open simple latches. Weasels squeeze through a 1-inch gap. Foxes will dig. Hardware cloth with a 1/2-inch mesh is the standard for walls and windows. Don’t use chicken wire for anything except keeping chickens in. It won’t keep predators out. Bury the apron of your run at least 12 inches underground or lay it flat extending outward 12 to 18 inches to deter diggers.
Ventilation is equally critical and way underestimated by beginners. Moisture buildup in a closed coop leads to respiratory disease and frostbitten combs faster than cold temperatures ever will. You want vents near the roofline, above the roost where drafts won’t hit birds directly. Even in winter.
For space, give each standard-size chicken at least 4 square feet inside the coop and 10 square feet in the run. More is always better. Crowding leads to pecking, stress, and disease. If you’re in a small suburban yard, 4 hens is often the sweet spot.
A few practical additions save your sanity: a good automatic coop door opener (the Run Chicken Automatic Door solar style is popular), a decent hanging feeder that keeps feed off the ground, and quality nesting box pads. I’ve used Precision Pet Nesting Box Pads for years. They cut down on lice and mite habitat compared to loose straw.
(Disclosure: This site may earn a small commission on purchases made through Amazon links at no extra cost to you.)
Feeding and Watering: Getting the Basics Right
| Life Stage | Age Range | Feed Type | Protein % | Notes |
|---|---|---|---|---|
| Chick | 0-8 weeks | Chick starter | 18-20% | Crumbled for small beaks |
| Growing | 8-18 weeks | Grower feed | 16-18% | Transition stage |
| Laying | 18-22 weeks+ | Layer feed | Varies | Contains added calcium; offer oyster shell free-choice |
| All ages | Ongoing | Oyster shell | N/A | Separate container; hens self-regulate once laying |
Feed is straightforward, but a few rules matter.
Chicks from 0 to 8 weeks need chick starter, typically 18 to 20% protein and crumbled for small beaks. From 8 to 18 weeks, switch to grower feed, usually 16 to 18% protein. Once hens start laying (typically 18 to 22 weeks), switch to layer feed, which contains added calcium for shell formation.
Don’t feed layer feed to chicks. The extra calcium damages their kidneys before they’re mature enough to process it. This is one of the more common and costly beginner mistakes I see.
Oyster shell should be offered free-choice in a separate container once hens are laying. Let them self-regulate. Some hens need more calcium than others, especially high producers.
Water needs to be fresh every single day. Chickens drink more than people expect. A standard hen drinks about a pint per day, and that doubles in hot weather. I’ve used both classic red-and-white plastic waterers and nipple waterer systems. Nipple systems stay cleaner, and I’d recommend making the switch once you’re comfortable with basics. Horizontal nipple waterers mounted to a 5-gallon bucket are inexpensive and work beautifully.
Kitchen scraps are fine in moderation. Know what’s off-limits: avocado (toxic), raw dried beans, large quantities of onion, moldy food, chocolate. Treats like leafy greens, watermelon, cooked eggs, and mealworms are all fair game and your birds will love you for them.
Step-by-Step: Your First Week With Chicks
If you’re starting with day-old chicks from a hatchery or feed store, the first week is the most critical.
Step 1: Set up the brooder before chicks arrive. A large plastic storage bin or cardboard box works fine for the first few weeks. Line it with paper towels (not slippery newspaper) for the first few days, then switch to pine shavings. Never cedar shavings. The oils are harmful to respiratory systems.
Step 2: Get the temperature right. Chicks need 95°F the first week, dropping by 5 degrees each week after. A radiant heat plate like the Brinsea EcoGlow is safer than a heat lamp and more closely mimics a mother hen. Watch the chicks, not just a thermometer. Chicks piled under the heat source are too cold. Chicks pressed against the walls away from the heat are too hot. Chicks spread out and active are just right.
Step 3: Dip their beaks in water immediately. When you place chicks in the brooder, gently dip each beak into the water so they learn where it is. Do the same with the feed.
Step 4: Watch for pasty butt. Monitor each chick’s vent daily in the first week. Pasty butt, where droppings dry and seal the vent shut, kills quickly if ignored. Clean it gently with a warm wet cloth and apply a tiny bit of coconut oil to prevent recurrence.
Step 5: Handle them daily. Ten minutes of gentle handling each day during the first few weeks produces significantly friendlier adult birds. This matters if you have kids who want calm, approachable hens.
Step 6: Keep it clean. Change bedding every 2 to 3 days in the brooder. Ammonia buildup from droppings is a respiratory hazard, and chicks are especially vulnerable.
Common Health Issues and When to Worry
Sources
- Run Chicken Automatic Door
- Precision Pet Nesting Box Pads
- Horizontal nipple waterers
- Brinsea EcoGlow
- Storey’s Guide to Raising Chickens by Gail Damerow
You don’t need to be a veterinarian to keep healthy chickens, but knowing what to watch for saves birds.
Respiratory symptoms (rattling breath, gurgling, nasal discharge) can indicate Mycoplasma gallisepticum or other respiratory infections. Separate the bird immediately to prevent spread. Tylan 50 injectable or Duramycin in water are commonly used, though consulting a vet is always better when available.
Mites and lice are almost inevitable at some point. Check under the wings and around the vent every few weeks. Diatomaceous earth dusted in the coop and a dust bathing area help with prevention. Permethrin spray is effective for treatment and works on birds and in the coop.
Egg binding is a genuine emergency. If a hen is straining, walking like a penguin, or sitting lethargic in a corner, she may have an egg stuck. A warm 20-minute soak and calcium supplement can help mild cases, but if she doesn’t pass the egg within a few hours, get her to a vet.
Storey’s Guide to Raising Chickens by Gail Damerow sits on my shelf and gets real use. It’s the most comprehensive and practical guide I’ve found for backyard keepers at any experience level.
Twelve years ago I knew absolutely nothing about chickens. I killed a few. I made plenty of mistakes. I learned most of what I know by getting it wrong first. But I also collected that first egg with both hands, and every spring when the pullets start laying and the eggs come in small and frequent and completely impractical for a family that already has 60 in the fridge, I remember why I do this. It’s not just the eggs. It’s the whole ridiculous, wonderful thing.
If you’re ready to start, start small, start prepared, and don’t be afraid to get it a little wrong along the way.
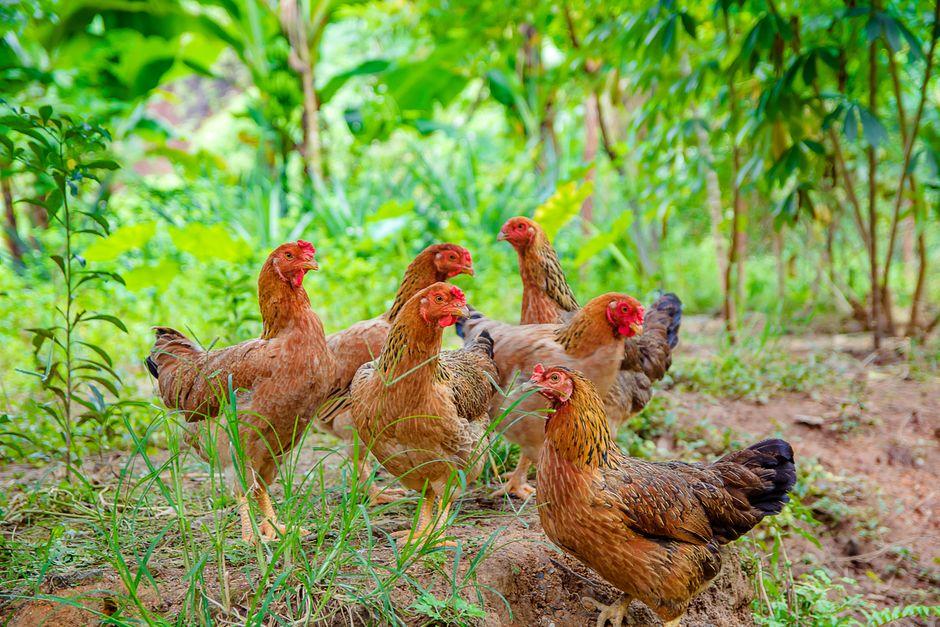
Photo: Julissa Pires via Pexels