 Sarah Mills
I killed six chicks my first year. Not all at once, but one by one, over about three weeks, and every single time I was convinced I was doing everything right. The brooder temperature was “about right.” The water was clean. The feed was there. What I didn’t understand yet is that baby chicks exist on a knife’s edge for the first few weeks of their lives, and vague is the enemy.
That was ten years ago. I’ve raised hundreds of chicks since then, in everything from a $400 purpose-built brooder to a plastic storage tote with a heat lamp bungee-corded to a shelf. Here’s what I actually know.
The Brooder Setup Nobody Gets Right the First Time
Most beginner guides tell you to keep brooder temperature at 95°F the first week, dropping 5 degrees per week until you hit room temperature. That advice isn’t wrong. It’s incomplete in a way that gets chicks killed.
Temperature at what point in the brooder? A heat lamp pointed at the center of a 30-gallon tote creates a hot spot that might read 95°F directly under the bulb and 70°F at the edges. That’s actually fine, and it’s exactly what you want, because chicks thermoregulate by moving. What you don’t want is a brooder so small or so uniformly heated that they can’t get away from the heat source. I’ve seen people jam twelve chicks into a plastic bin barely big enough for a six-pack, crank a 250-watt red bulb over it, and wonder why they’re losing birds. Heat stress kills just as fast as cold.
The real cheat code, if you haven’t heard of it yet: the Brinsea EcoGlow. It’s a contact heater that chicks snuggle under like a mother hen. No hot spot, no fire risk, and the chicks self-regulate beautifully. The 20A model runs about $80 and handles up to 20 chicks. I was skeptical for years because I’d grown up with heat lamps, but I switched in 2021 and I’m not going back. Brinsea EcoGlow on Amazon (affiliate link).
If you’re sticking with a heat lamp, use a 250-watt infrared bulb (the red ones, not clear), clip it securely with an actual lamp clamp, and then bungee-cord it as a backup. The number one cause of coop fires in backyard chicken keeping is a heat lamp that fell. Don’t be that person.
For bedding, I’ve tried everything. Pine shavings win. Not newspaper (too slippery, causes leg injuries in the first days), not straw (too coarse, chicks get tangled and can’t find food easily), not cedar (toxic). A bag of small-flake kiln-dried pine shavings from the feed store runs about $7 and will cover a modest brooder for weeks. Change the wet spots daily. Full replacement every four to five days for a group of ten chicks.
Feed, Water, and the Mistakes That Cost You Birds
| Item | Cost | Coverage/Duration | Notes |
|---|---|---|---|
| Pine shavings (bag) | ~$7 | 4-5 weeks for 10 chicks | Change wet spots daily, full replacement every 4-5 days |
| Brinsea EcoGlow 20A | ~$80 | Up to 20 chicks | Contact heater, no fire risk, handles temperature drop naturally |
| Sav-A-Chick electrolytes | ~$3 | First 48 hours | Recommended for shipped chicks |
| Horizontal nipple waterers | ~$10 | Pack of 10 | Inexpensive long-term water solution |
| Heat lamp + infrared bulb | Variable | Ongoing | Requires secure clamp and bungee-cord backup |
Get chick starter with 18-20% protein. Whether you want medicated or unmedicated has been debated in backyard chicken forums since the early 2000s. Here’s my honest take: if your chicks came from a hatchery and were vaccinated for Marek’s, don’t use medicated feed (it can interfere with the vaccine response). If they weren’t vaccinated, medicated starter adds amprolium, which helps protect against coccidiosis. If you don’t know, ask. It’s a simple question.
I’ve used Purina Flock Raiser or their Medicated Chick Starter most consistently. Reliable, available at Tractor Supply, and the nutrition profile is solid. Some people swear by organic or non-GMO feeds, and those are fine choices if you want them, but don’t let anyone convince you that conventional chick starter is going to harm your birds. It won’t.
Water is where I see more mistakes than anywhere else.
Baby chicks will drown in a standard waterer if the trough is too deep. They’ll also soil their water within about four minutes of it being cleaned, and wet litter leads to pasty butt, respiratory issues, and coccidiosis pressure. For the first two weeks, use a one-quart mason jar waterer (the kind with the red base) and put clean marbles or pebbles in the trough. Seriously, it works. The chicks can still drink but can’t fall in.
For the longer term, a nipple waterer keeps litter dramatically drier. Horizontal chicken nipple waterers on Amazon are inexpensive, about $10 for a pack of 10, and you can drill them into the bottom of a PVC pipe or a bucket. Chicks typically figure out horizontal nipples by day two or three.
One more thing: electrolytes in the first 48 hours if your chicks went through any shipping stress. Sav-A-Chick packets (around $3 at most farm stores) mixed into the water make a real difference. Shipped chicks are stressed chicks.
The First 72 Hours Are Not Like the Rest
HOW TO RAISE CHICKS | EASY Baby Chicken Care 101 | Egg Laying Hens For Beginners | Backyard Flock · Oak Abode on YouTube
Hatchery-shipped chicks can go about 72 hours on the nutrients in their yolk sac, but that doesn’t mean you should let them sit in a box waiting for you to set up your brooder. Have everything ready before they arrive: warm brooder, fresh water with a small amount of sugar or electrolytes, and chick starter scattered directly on the brooder floor for the first day (not just in the feeder, because they need to stumble onto it and learn it’s food).
When you unbox them, dip each chick’s beak into the water before setting it down. Not dunked, just touched to the water so they get the idea. Then step back. The worst thing you can do is hover over a new group of chicks constantly. They stress out, they pile, and piling leads to suffocation.
Check for pasty butt twice daily for the first week. This is when poop dries and seals over the vent, and it’ll kill a chick within a day or two if you don’t catch it. Warm wet cotton ball, gentle pressure, done. It’s not glamorous but it’s the job.
Brooder to Coop: Getting the Timing Right
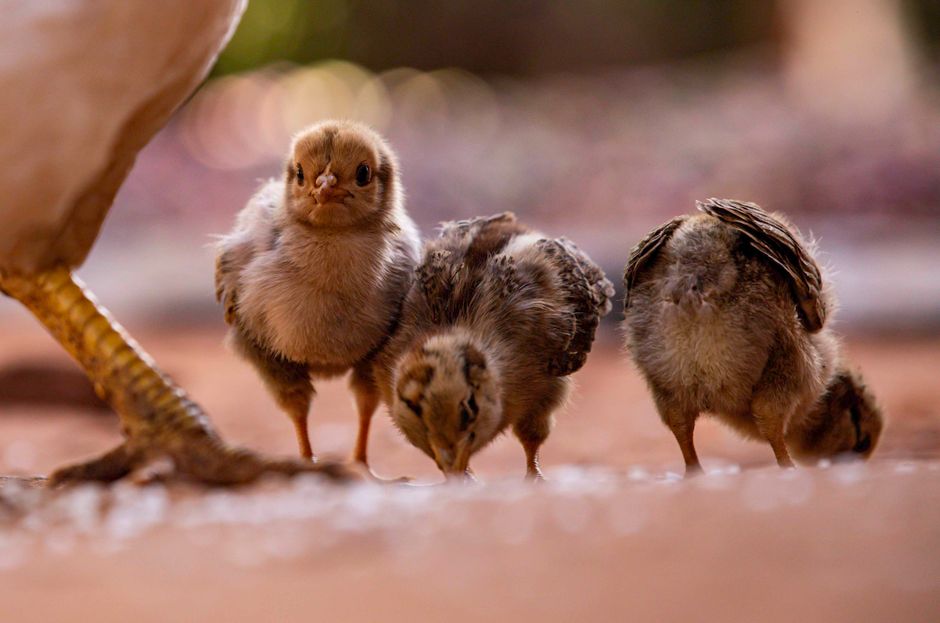
People ask me all the time when chicks can go outside, and the answer is genuinely “it depends.” Here’s my working rule: fully feathered (no more fluffy down showing, real feathers covering the body) and nighttime temps above 50°F consistently. For most breeds, that’s around six to eight weeks. Cold-hardy breeds like Plymouth Rocks or Wyandottes transition more easily than Mediterranean breeds like Leghorns or Anconas, which handle cold less gracefully.
Don’t just open the door and shove them out. Move the brooder or a heat source into the coop for a few days if temperatures are iffy. Let them get used to the space before they’re expected to regulate their own temperature in it. And if you’re integrating into a flock with existing adult hens, that’s a whole separate conversation with its own set of landmines. Short version: wait until the chicks are close to adult size before direct contact, and expect pecking order drama for two to three weeks.
One thing almost nobody mentions: the coop air quality matters more during the transition than most people think. Chicks that grew up in a warm brooder indoors are going to hit coop humidity and ammonia levels that their respiratory systems aren’t ready for. Keep that coop clean and ventilated before you move them in. It’s not optional.
The Breed Question (and Why It Matters Earlier Than You Think)
Sources
You can’t raise chicks well without knowing something about what they’re going to become, because breeds differ in surprising ways even at the chick stage.
Buff Orpingtons are calm, grow fast, and make excellent first-time birds. Rhode Island Reds are curious and vigorous but can be bullies in a mixed flock from very early on. Easter Eggers are flighty and will absolutely roost on top of your brooder lamp fixture by week two if you give them the chance. Cornish Cross meat chicks need a completely different management approach: lower protein after week three, limited access to feed for 12 hours a day to prevent leg and heart problems, and a tighter processing window. Don’t mix Cornish Cross with laying breeds in the same brooder unless you enjoy chaos.
If you’re sourcing from a hatchery, Murray McMurray and Hoover’s are both reliable. If you can find a local breeder for specific breeds, that’s almost always better for quality and it dramatically reduces shipping stress. Check your state’s Craigslist poultry section, your county fair contacts, or local 4-H groups.
The chicks I lost in year one weren’t lost because I didn’t care. I cared enormously. They were lost because I didn’t know what I didn’t know, and the resources I found were written for idealized conditions rather than real ones. A drafty garage in March in Ohio doesn’t behave like the diagrams suggest. Real chicks don’t read temperature charts.
What they do respond to: consistency, warmth in the right amount, clean water they can actually reach, and someone checking on them twice a day with their eyes open. Get those four things right and your odds go up dramatically. The rest you’ll learn as you go.
Photo: Duygu via Pexels