 Dr. Tom Henderson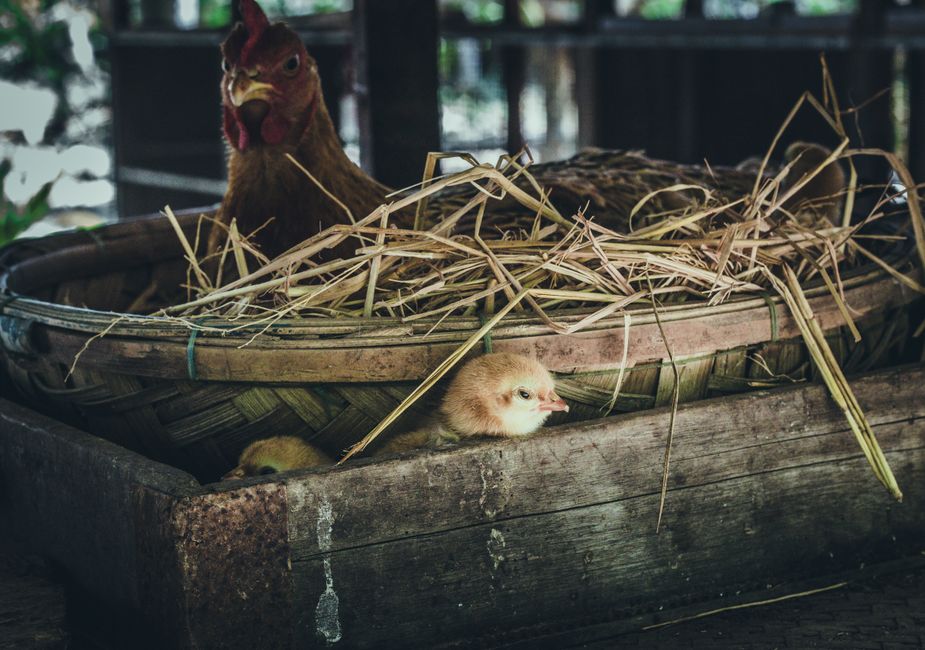
A hen refusing her nesting box isn’t being stubborn. She’s telling you something’s broken. Maybe the box is too small, too bright, lacks privacy, or sits in the wrong spot, chickens have weirdly specific demands about where they’ll lay. Fix this problem and you’ll collect clean eggs from the same spots every morning. Mess it up and you’re hunting eggs in corners, under feeders, and places you’d rather forget exist.
How Many Nesting Boxes Do You Actually Need?
The conventional wisdom says one box per four to five hens. That’s a decent starting point, but reality is messier. Chickens are creatures of habit, and they’re competitive about certain boxes. Even with eight boxes for eight birds, you’ll watch six of them line up for the same two.
Too few boxes creates actual problems though. Hens lay on the floor. They break eggs trying to squeeze together. Worse, they start eating eggs out of sheer frustration. For 12 hens, I’d recommend at least three boxes. Four or five gives you real breathing room.
If you’re planning your whole setup from scratch, the guide on how many chickens should I get helps you sort out flock size before you build anything.
Community nesting boxes, those long open troughs split into sections, work great for bigger flocks. Individual enclosed boxes suit smaller backyard operations where you want hens to feel secure.
The Right Dimensions Matter More Than You Think
Standard nesting box size hovers around 12x12 inches for most laying breeds. That’s fine for Leghorns, Easter Eggers, medium-sized hens. But if you’re keeping Jersey Giants, Brahmas, or Orpingtons, go bigger, 14x14 or even 16x16. A hen crammed into a tiny box won’t touch it.
Depth matters just as much. Boxes need at least 12 inches so eggs don’t roll out and hens feel enclosed enough to settle. A front lip of about 3 to 4 inches keeps bedding and eggs inside without making entry awkward.
Height placement gets overlooked by beginners constantly. Mount boxes 18 to 24 inches off the coop floor. Low enough hens can reach them easily, high enough they stay dry and cleaner. Here’s the critical bit though: your roosts must sit higher than your nesting boxes. Chickens always sleep at the highest available spot. If boxes are the tallest thing in your coop, hens will roost in them overnight and fill them with manure. It’s a mess.
Materials, Bedding, and What Actually Stays Clean
10 Chicken Coop Mistakes you DON'T want to Make ! · Carolina Coops® on YouTube
| Bedding Type | Absorbency | Cost | Replacement Frequency | Best For |
|---|---|---|---|---|
| Pine shavings | High | Low | Frequent | Budget-conscious keepers |
| Straw | Medium | Low | Regular | Hens that like arranging |
| Hemp bedding | Very High | Higher | Infrequent | Long-lasting, mold-resistant |
| Nesting box pads | High | Medium | Very quick swap | Minimal mess, cleanliness |
Wood is the standard for DIY nesting boxes and works well when built right. Untreated pine or plywood does the job. Skip pressure-treated lumber, chemicals get absorbed by eggs over time. The problem with wood is it’s porous and harbors mites, especially red mites that hide in cracks during the day and feed on hens at night.
Metal and plastic boxes are cleaner, easier to maintain, and don’t hide mites the same way. Roll-out nesting boxes let eggs gently slide to a collection tray after being laid. They cost more upfront but genuinely cut down on breakage and egg eating. Worth it if you’re done hunting for eggs.
Bedding options inside the boxes are solid across the board:
- Pine shavings: Absorbent, cheap, swaps out quick. Needs regular replacement.
- Straw: Hens like arranging it. Turns matted and damp if you don’t change it enough.
- Hemp bedding: Pricier but soaks moisture up faster and resists mold. Lasts longer between changes.
- Nesting box pads: Pre-cut excelsior pads that sit flat in the box. Replace in seconds, hold their shape, no mess like loose materials.
I’ve had good results with these nesting box pads on Amazon for people who don’t want to mess with loose stuff. Eggs stay cleaner and swapping takes 30 seconds. (We may earn a small commission on purchases at no extra cost to you.)
The chicken coop bedding options guide covers your whole coop’s bedding picture if you want the full breakdown.
Location and Privacy: The Often-Ignored Details
Hens want to feel hidden when they lay. It’s instinct from wild ancestors who had to protect eggs from predators. A nesting box in bright light, an open area, high-traffic section of the coop gets ignored while hens find a dark corner behind the waterer instead.
Put boxes on the darker, quieter coop wall. Adding a curtain, even just burlap or canvas strips, across the box front makes a huge difference. You’d be shocked how quickly hens start using a box once they have that tiny bit of cover.
Boxes should be reachable from inside the coop but ideally have an external egg collection door you can open from outside. Reaching into a crowded coop every morning isn’t pleasant, and an outside door keeps things clean and faster.
Don’t place boxes near the main door where winter drafts cut through, or directly under windows where summer sun floods in. Keep them away from the waterer. Water splashing plus bedding equals mold and ruined eggs.
Step-by-Step: Setting Up Nesting Boxes the Right Way
Whether you’re starting fresh or moving existing boxes, here’s the sequence:
Calculate your numbers. Count your hens, plan for one box per four, round up. Ten hens need at least three boxes, ideally four.
Choose box size. Measure your biggest breed. Standard layers: 12x12 inches. Large breeds: 14x14 to 16x16 inches. Depth 12 inches minimum.
Set the height. Mount boxes 18 to 24 inches off the ground. Make sure roost bars are at least 6 inches higher than the box tops.
Pick the location. Darkest, quietest wall. No drafts, no water sources, away from the main door.
Add a front lip. 3 to 4 inches keeps bedding and eggs contained without blocking entry.
Install bedding. Add 2 to 3 inches of pine shavings, straw, or a nesting pad. Place fake eggs or golf balls in each box to signal where hens should lay.
Add privacy curtains. Hang burlap, canvas, or old feed sacks loosely over the entrance. Leave a gap so you can still see inside.
Watch and adjust. Give it a week. If hens are still laying on the floor, watch where they prefer and adjust box location or height.
For coop designs from the ground up, browse chicken coop plans free for layouts that build proper box placement in from the start.
Troubleshooting: When Hens Won’t Use Their Boxes
Sources
Floor laying is the most common complaint. Usually it’s boxes that are too bright, too exposed, placed too high (some hens won’t bother jumping), or introduced before hens learned to use them. Ceramic eggs or golf balls in the box is one of the oldest tricks and it actually works. Hens see them, check them out, and connect the spot with laying.
Broody hens camping in boxes is another headache. A broody hen sits in one box all day, blocking other hens from getting in. If you’re not hatching, you need to break her broodiness by moving her repeatedly, cutting her nesting access, or using a broody cage.
Egg eating usually starts with broken eggs in packed boxes. Once a hen figures out eggs are food, the behavior spreads fast. Roll-out boxes fix this most reliably. You can also darken the boxes more, raise the front lip higher, and collect eggs twice a day instead of once.
Dirty eggs come down to two things: soiled bedding and hens sleeping in boxes overnight. Change bedding weekly minimum, more often in wet weather. If hens are roosting in boxes, verify roost bars are genuinely higher and block box access after dusk until they learn to roost right.
Getting nesting boxes right pays off every single day. Clean eggs, predictable spots, hens that actually use what you built. Dial in the size, placement, and bedding and you’re done thinking about it. The chicken coop ventilation guide is worth reading next since airflow directly affects how fresh and dry your nesting areas stay year-round.
Photo: Thái Trường Giang via Pexels