 Carol Thompson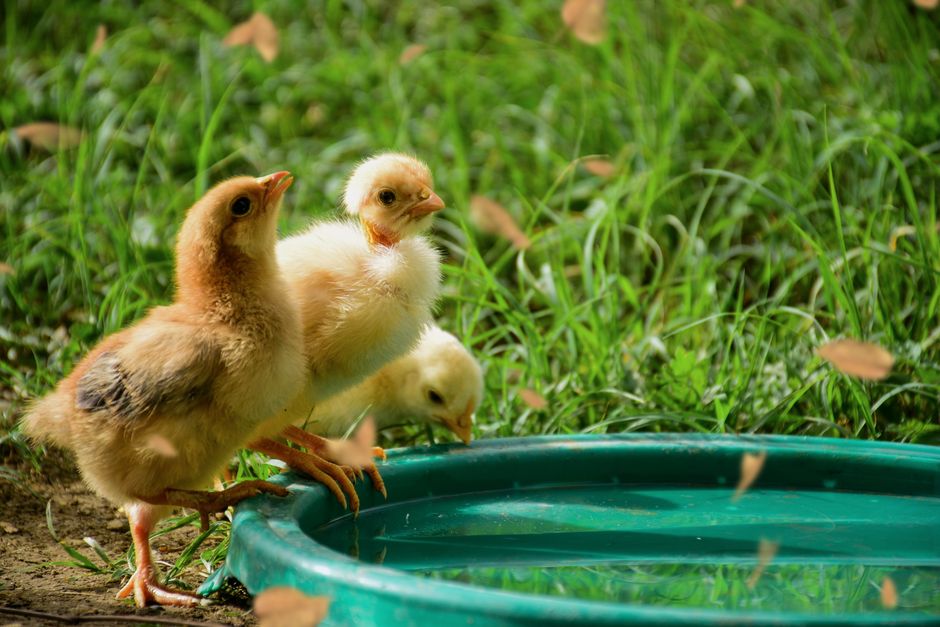
Three chicks died in my first brooder before I figured out what I was actually doing wrong. Not from cold. From heat. I’d set up a 250-watt red heat lamp about 18 inches above the bedding, figured that was “about right” based on a quick Google search, and watched my little flock of straight-run Easter Eggers pile into one corner and pant for two days before I connected the dots. By the time I got the temperature right, I’d already lost three.
Nobody told me that the lamp wattage, the bulb type, the brooder dimensions, and the ambient temperature of your space all interact in ways that make any single “hang it X inches away” rule basically useless. That’s what this article is actually about.
Why Heat Lamps Are Still Worth Understanding (Even If You’ve Heard About Alternatives)
Brooder plates. Mama heating pads. Radiant heat panels. Yeah, they exist, and I use a brooder plate myself now for small batches. But heat lamps still make sense in plenty of situations: large batches of 25+ chicks, cold garages or barns in February, outdoor brooders, and times when you need flexible, adjustable heat coverage fast. They’re also dirt cheap upfront. A decent brooder plate like the Brinsea EcoGlow Safety 600 runs $80-$100. A heat lamp fixture with a 250-watt bulb costs maybe $20 total.
What surprised me was how many people get burned (sometimes literally) not because heat lamps are inherently dangerous, but because they’re using hardware store setups that weren’t designed for sustained high-heat operation. More on that in a minute.
Choosing the Right Bulb: Red vs. White vs. Ceramic
| Bulb Type | Wattage | Best For | Fixture Requirement |
|---|---|---|---|
| Red heat lamp | 250W (typical) | Traditional choice; may reduce pecking behavior | Standard clamp fixture |
| White clear bulb | 250W (typical) | Runs hotter than red at same wattage | Standard clamp fixture |
| Ceramic heat emitter | 100-150W | No light; allows normal sleep cycle | Porcelain socket, high-temp rated |
| 250W lamp in warm indoor space | 250W | Often overkill | Standard clamp fixture |
| 150W lamp in warm indoor space | 150W | Better for small indoor brooders | Standard clamp fixture |
Most people buy whatever’s on the shelf. Usually that’s a 250-watt red heat lamp bulb, and honestly that’s a fine starting point for a brooder in a typical 60-70°F space. But the options aren’t all the same.
Red bulbs are the traditional choice. The red tint is supposedly meant to reduce pecking behavior because chicks can’t see blood as clearly, and some keepers swear by it. I’ll be honest: in 10 years I haven’t noticed a dramatic difference compared to white bulbs, but I also keep my brooders at reasonable densities. If you’re crowding 50 chicks into a small space, the red light might help.
White clear bulbs run hotter than reds of the same wattage in my experience, though the actual thermal output should be similar. The difference might just be what you feel.
Ceramic heat emitters are what I’d reach for if I were starting over. No light at all, just infrared heat. Chicks can sleep on a normal day/night cycle instead of sitting under a perpetual noon sun. The Zoo Med Ceramic Heat Emitter in 100 or 150 watts works well, but you need a porcelain socket fixture rated for high wattage, not a cheap plastic one. This is non-negotiable. Plastic fixtures and ceramic emitters together equals fire risk.
On wattage: 250 watts is often overkill for a small indoor brooder. In a warm house, 150 watts might be plenty. In a cold barn in March, 250 watts might barely do the job. The only way to know is a thermometer on the brooder floor, which brings me to the part most beginner guides skip over.
Temperature Management Is the Whole Job
The standard advice is 95°F the first week, drop by 5°F each week until you hit ambient temperature around week 6. That’s correct. What nobody explains clearly is that “95°F” means at the chick’s back level in the warmest zone under the lamp, and the rest of the brooder should be cooler so chicks can self-regulate.
This is what got me. My brooder was too small. The whole floor was basically the same temperature. Chicks had nowhere to escape the heat, so they were stress-panting in the corner farthest from the lamp trying to find relief. A brooder that’s too small is arguably more dangerous than a lamp that’s set slightly low.
My actual setup now: I use a 40-gallon Rubbermaid stock tank for small batches, which gives chicks a heat zone on one end and a cool zone on the other. For larger batches, a plywood box no smaller than 4x4 feet. I aim for roughly one-third of the floor under direct heat, two-thirds at ambient.
Get a reliable thermometer. I keep a ThermoPro TP50 clipped at brooder-floor height near the center of the warm zone. Check it hourly for the first 24 hours after setup. Then actually watch your chicks, because chick behavior tells you more than any thermometer reading.
Chicks spread out, active, some sleeping flat (not piled): temperature is right. Chicks piling tightly under the lamp, cheeping loudly: too cold. Chicks spread to the edges, panting, avoiding the lamp: too hot. Chicks all to one side: there might be a draft from that direction.
I’ve woken up at 2am more than once to check on a brooder. That’s probably excessive, but I’ve also never lost a chick to temperature issues since I started doing it for the first few nights.
The Actual Fire Safety Problem Nobody Explains Well
Heat lamps cause fires. Not because they’re poorly designed, but because people hang them with bailing twine, clip them to cardboard boxes, use cheap plastic fixtures, run them near flammable bedding, or just knock them over. The Consumer Product Safety Commission has documented fires in coops, garages, and homes traced to improperly secured heat lamps.
The specific risk is simple physics: a 250-watt bulb generates enough heat to ignite dry pine shavings if it falls or gets close enough. Most brooder fires happen at night when nobody’s watching.
What I actually do:
The lamp gets mounted with a chain or wire, not a clamp. Clamps fail. I use a length of heavy-gauge wire from the ceiling or a crossbar above the brooder, with the lamp attached at an adjustable height so I can raise it each week as the chicks need less heat.
Two attachment points, not one. If one wire fails, the other catches it.
The fixture matters. Don’t buy the flimsy $8 clamp lamps from Harbor Freight for this purpose. A proper Bayco SL-300 Clamp Lamp with a porcelain socket is about $14 and is actually rated for high-wattage bulbs. The socket material is the key detail.
Keep the bulb 18-24 inches above the bedding minimum, and never let the lamp hang over deep pine shavings without a wire guard around the bulb.
I also put a smoke detector in any building where I run a brooder. This costs $10 and is obvious, but you’d be amazed how many people skip it.
Week-by-Week Practical Guide
Sources
- Brinsea EcoGlow Safety 600
- Zoo Med Ceramic Heat Emitter
- 40-gallon Rubbermaid stock tank
- ThermoPro TP50
- Bayco SL-300 Clamp Lamp
Week 1: Set lamp so the warm zone hits 95°F. Use paper towels over pine shavings for the first 3 days so chicks learn to eat from the feeder rather than scratch at bedding. I use a 1-quart chick waterer with marbles in the tray for the first few days to prevent drowning.
Week 2: Raise the lamp 2-3 inches or switch to a lower-wattage bulb. Target temp drops to 90°F. Chicks will start feathering on the wing tips and you’ll notice them ranging further from the heat source.
Week 3: Down to 85°F. Chicks are noticeably more active and less dependent on the heat zone. If your ambient space is above 70°F and chicks aren’t clustering under the lamp, you might not need the lamp on continuously at this point.
Weeks 4-6: Continue dropping 5°F per week. Most chicks in a warm-ish space (above 65°F) are basically self-regulating by week 5. Heritage breeds like Buff Orpingtons tend to feather out a bit faster than high-production breeds in my experience, though the research here is genuinely mixed.
The lamp hanging over a brooder at 2am on a February night is one of those things that looks simple until it isn’t. Get the fixture right, get the temperature right, give the chicks room to move toward or away from the heat, and watch them more than you watch the thermometer. They’ll tell you what they need.
Photo: Gilmer Diaz Estela via Pexels